Live Preview
Live preview allows you to show changes in your website collection before publishing and without the need to refresh the browser.
Live Preview Pre-Requisites
Before setting up live preview, ensure your Directus instance can embed external content by configuring the content security policy headers as described below.
Required Environment Variable
Your website will not be able to be rendered in your Directus instance if you do not set CONTENT_SECURITY_POLICY_DIRECTIVES__FRAME_SRC="<your-website-base-url>" within your instances env.
Learn more about Directus env security settings.
Configure Your Website Content Security Policy
Your website must allow Directus to embed it in an iframe. Add this header to your website: Content-Security-Policy: frame-ancestors 'self' <your-directus-url>;. If you're unsure where to add this, check your web server configuration files, your site's build configuration, or your hosting platform's security settings.
For more information, see the Live Preview Reference Tutorials.
Configure a Live Preview URL
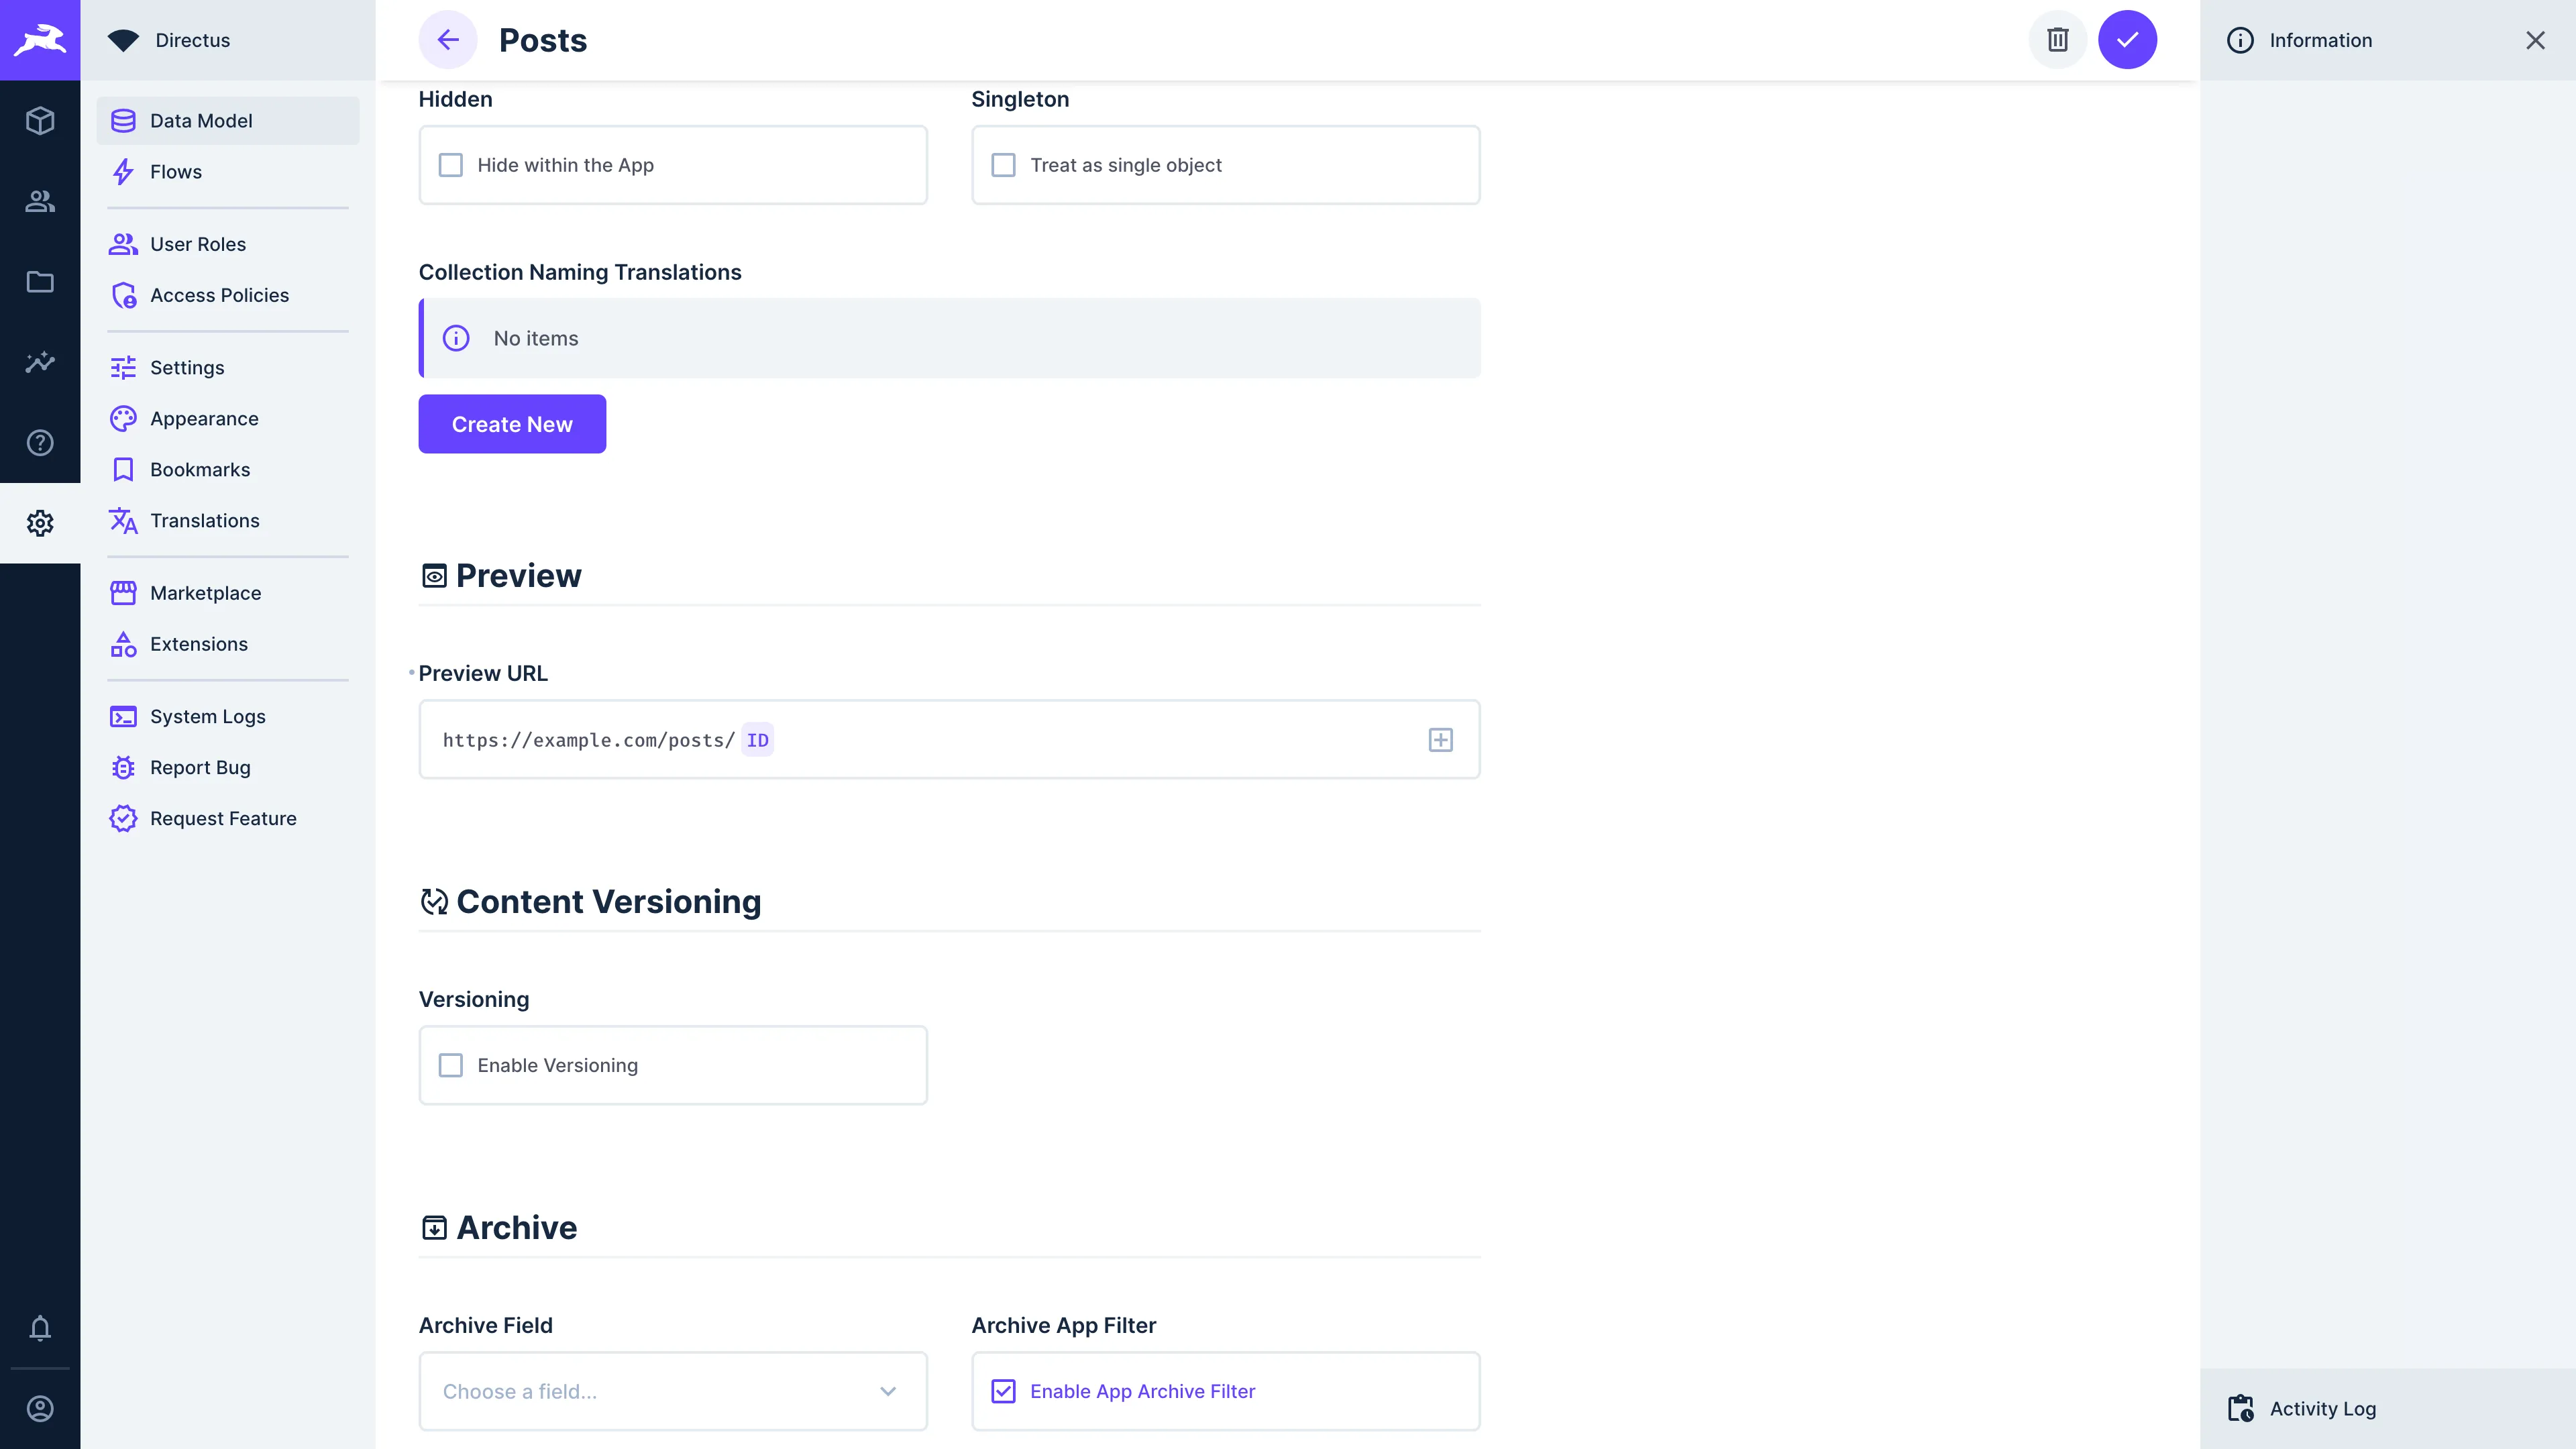
Navigate to Settings -> Data Model and select the collection you wish to configure. In the "Preview URL" section, specify the Preview URL for your project by selecting the field you wish to use to identify your object in your application from the dropdown and entering a URL in this format:
http://your-website-url/<field>
If your project runs on more than one environment, use a Preview Base URL instead of a hardcoded host.
Set a Preview Base URL
The Preview URL is part of your collection's configuration, so it is included in schema snapshots. If the URL contains a hardcoded host, promoting the schema from development to staging to production copies that host into every environment.
The Preview Base URL project setting solves this. You store only the path in the collection's Preview URL, and each Directus instance supplies its own host.
- Navigate to Settings > Project and find the Live Preview section.
- Enter your website's base URL in Preview Base URL, for example
https://staging.example.com, and save. A trailing slash is ignored. - Navigate to Settings > Data Model and select your collection.
- In the Preview URL field, select Preview Base URL from the variable dropdown, or type
{{$preview_base_url}}. - Add the rest of the path after the variable, for example
{{$preview_base_url}}/blog/{{slug}}.
When you open the preview, Directus replaces {{$preview_base_url}} with the value from project settings. With the example above, the item with the slug my-post previews at https://staging.example.com/blog/my-post.
You can combine the variable with others, such as {{$version}}:
{{$preview_base_url}}/blog/{{slug}}?preview=true&version={{$version}}
Use Live Preview Across Environments
Now that the host lives in project settings, you can promote the same schema to every environment:
- On each Directus instance (for example development, staging, and production), set Preview Base URL to that environment's website URL.
- Configure the collection's Preview URL once, using
{{$preview_base_url}}followed by the path. - Promote the schema with the Schema API or Environment Sync. The Preview URL carries only the path, so each instance resolves it against its own base URL.
Each environment still needs its own CONTENT_SECURITY_POLICY_DIRECTIVES__FRAME_SRC value that matches its base URL, as described in the pre-requisites.
settings resource by default, and preview_base_url is part of that record. Pushing settings overwrites the target's Preview Base URL with the source's value. Exclude settings with --no-settings, or set the value again on the target after pushing. See Configuration resources.Using Live Preview with Your Application
Once configured, Directus will send a request to your application for a page with the specified URL format. For example, if you've configured the URL to be https://mysite.com/posts/{id}, and load the preview for the item with an id of 42, then your application will receive a request to https://mysite.com/posts/42. You may choose to add preview=true to indicate to your client that it needs to treat this as a live preview. You may also choose to add an access token with the ability to view items as an additional URL query parameter.
You can then develop your application to handle that request and return a page that shows a preview of the item requested.
Previewing Item Contents in the Editor
In an item page, toggle "Enable Preview" at the top of the page. Whenever you create or edit an item in your collection and "click" save, you should see a live preview of the item on the right-hand side of the screen.
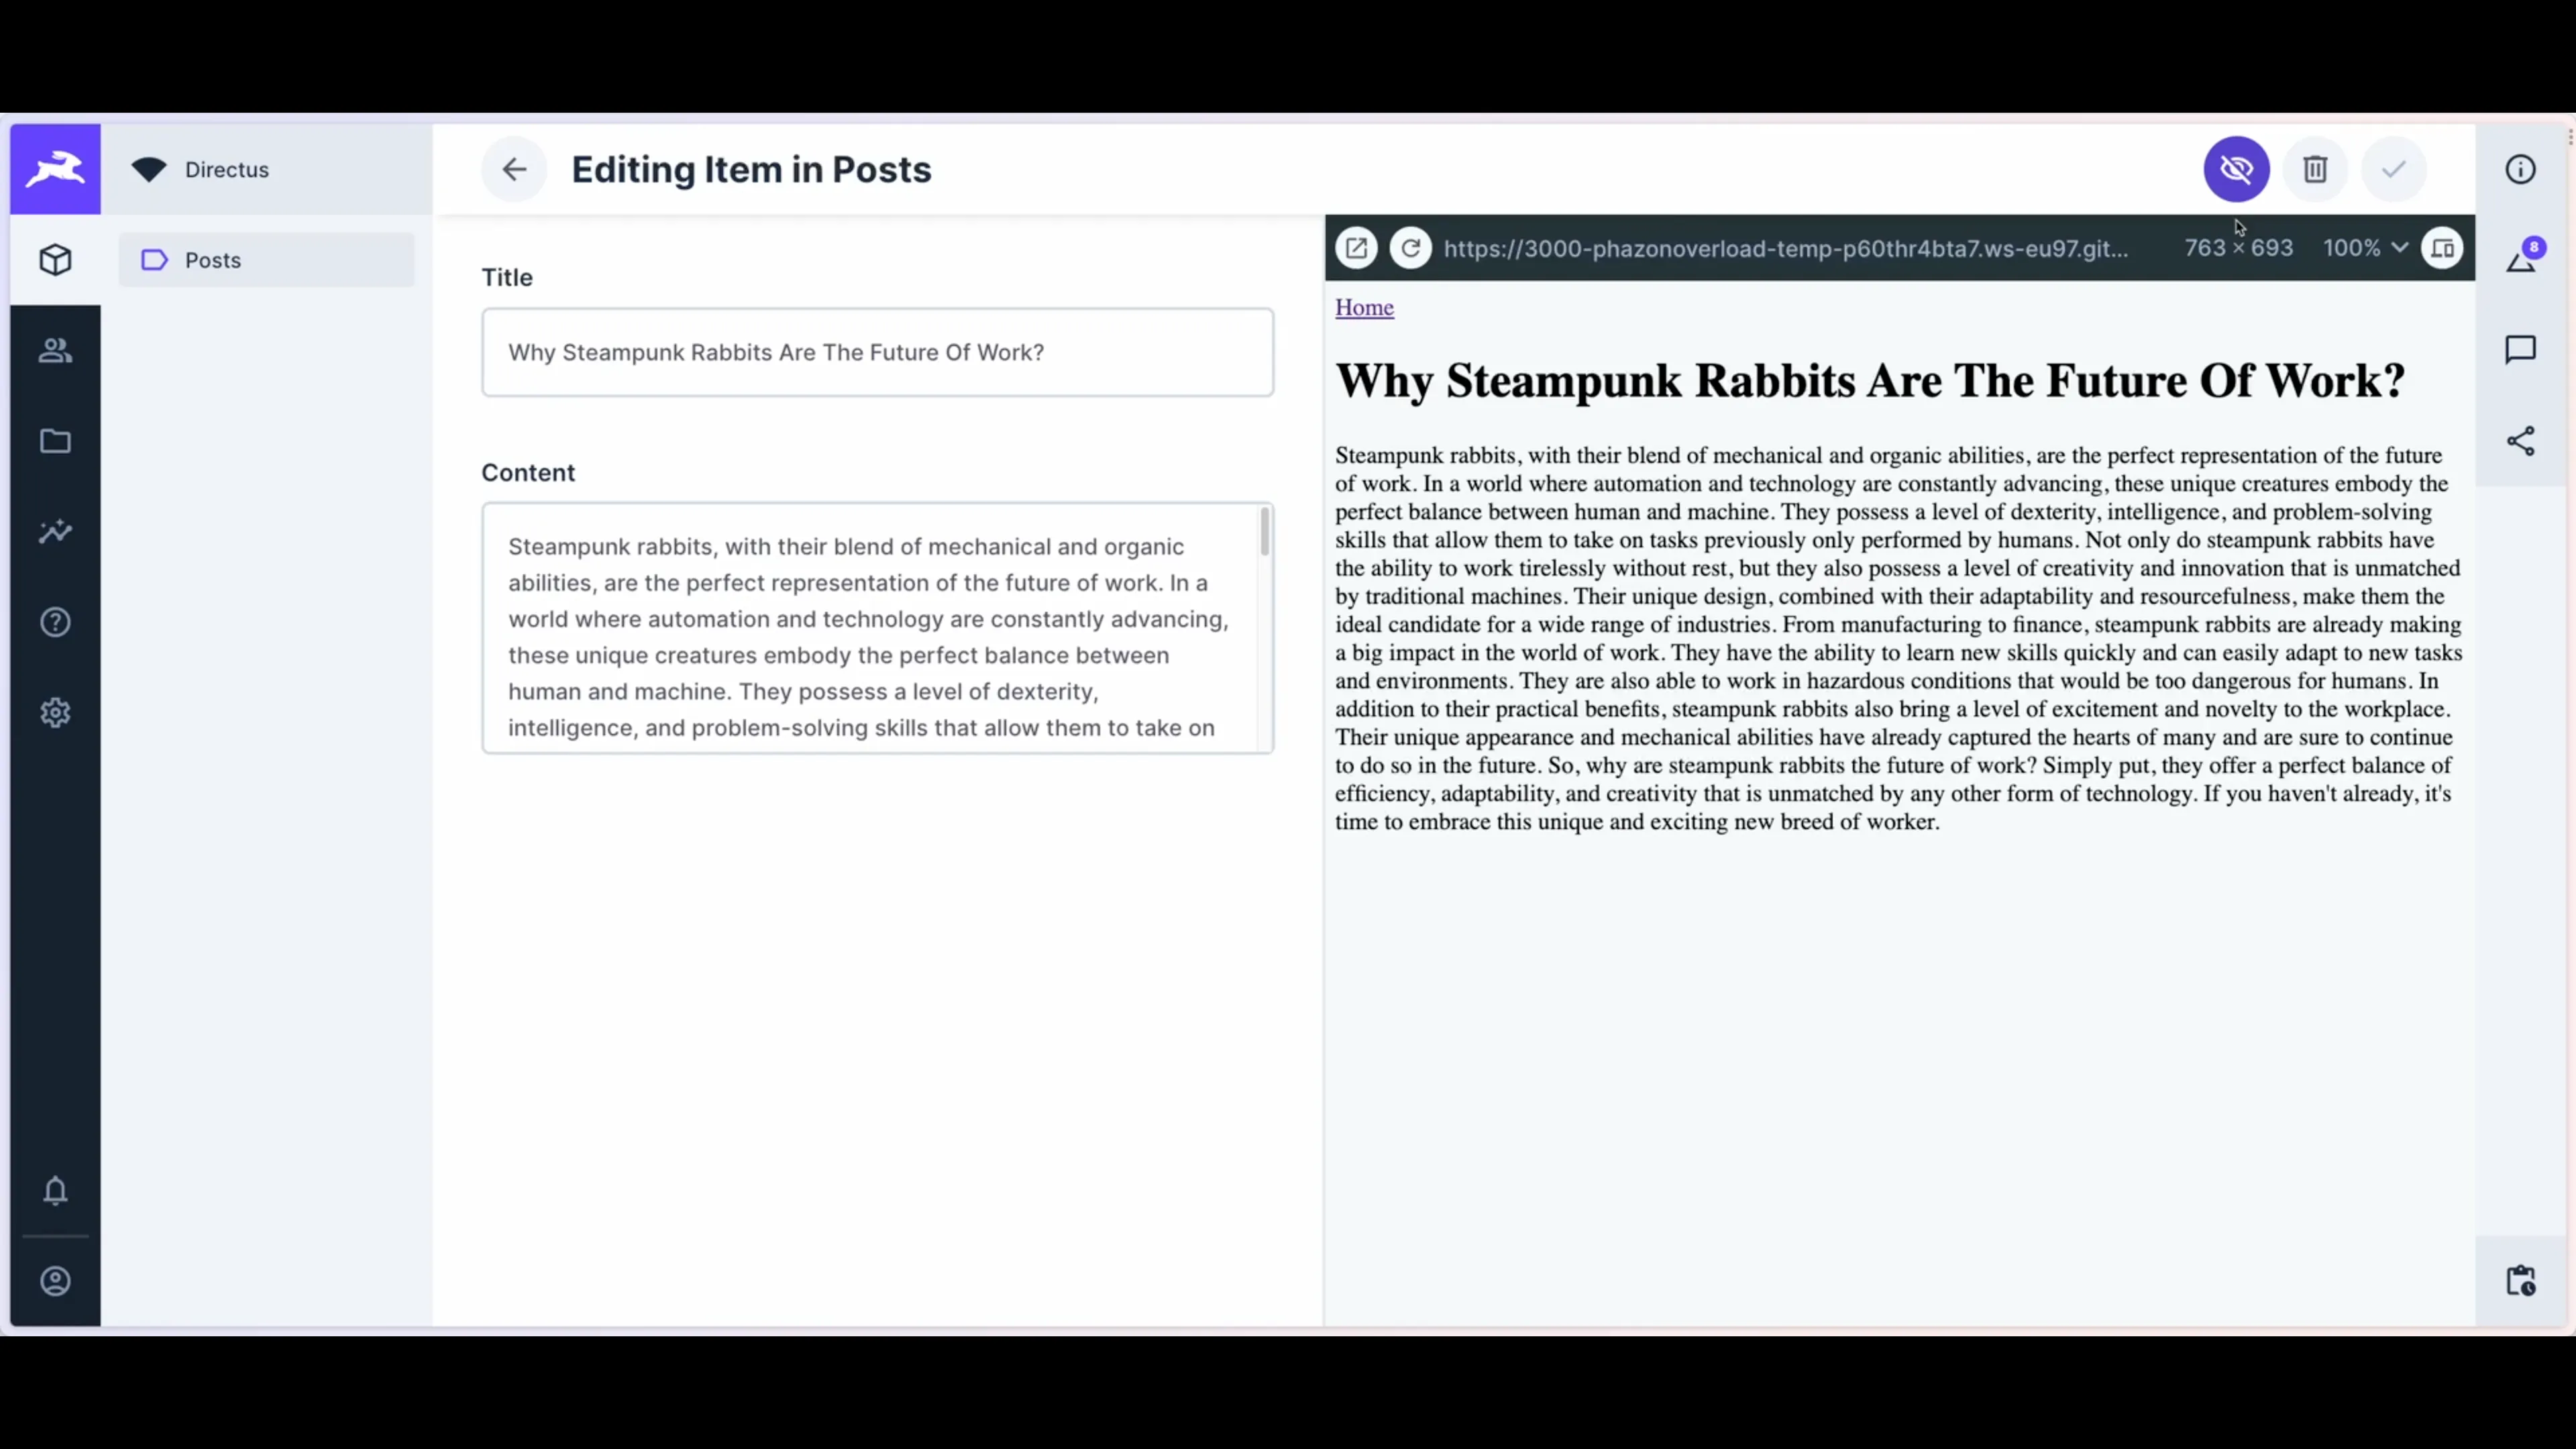
Clicking on also lets you preview your content on desktop and mobile screens, while allows you to pop the live preview out into a separate window.
Using Versions
If you've enabled content versioning, you can configure your preview URL to pass the selected version to your frontend.
- Navigate to Settings > Data Model and select your collection
- In the Preview URL field, include the
{{$version}}variable - Example:
https://your-site.com/{{slug}}?preview=true&version={{$version}}
Directus passes the selected version key as the version query parameter. Your frontend must read this and fetch the versioned content from the API (e.g. /items/posts/42?version=draft). Without this, the preview will display main content regardless of the selected version.
{{$version}}, visual editing in the live preview pane works with content versions too. When viewing a version, only items on collections with versioning enabled will show editable elements.Visual Editing in Live Preview
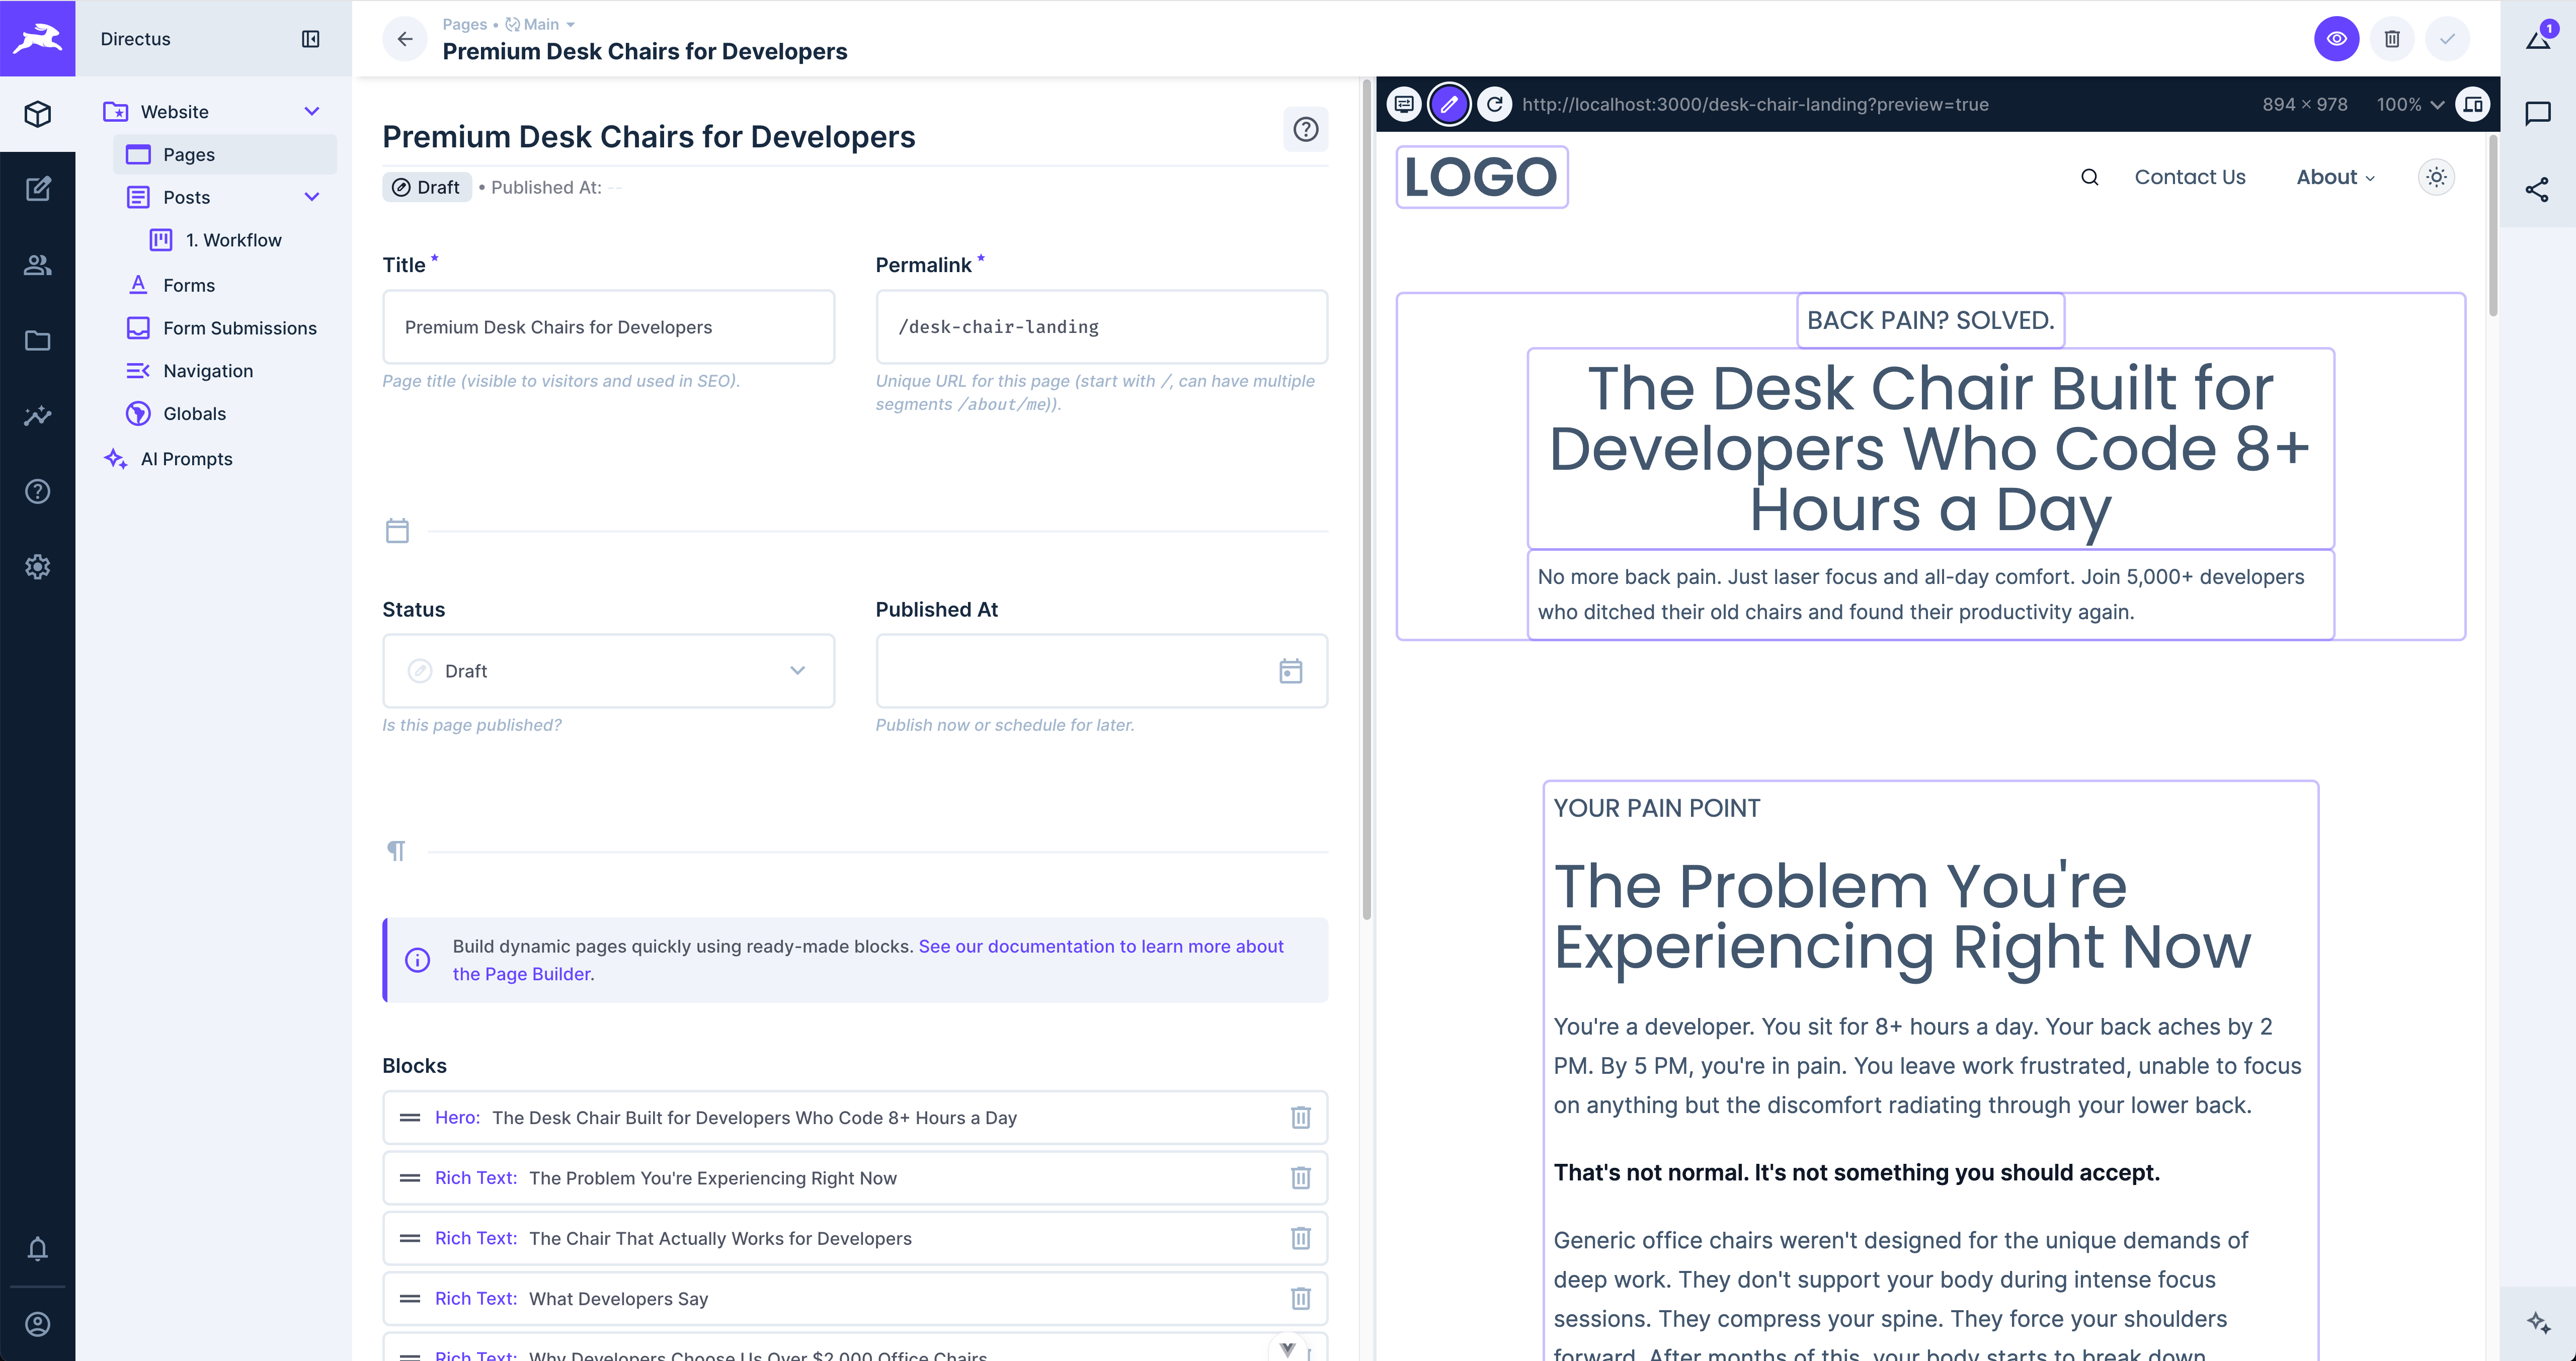
If your frontend is configured with the Visual Editor Frontend Library, the live preview pane becomes interactive. You can then hover and click to edit content directly without leaving the item page.
Requirements
Visual editing in live preview requires:
- A Preview URL configured on the collection
- At least one Visual Editor URL configured in Settings → Visual Editor that matches the preview URL's origin
- Frontend configured with the Visual Editor Frontend Library
- Viewing an existing item (not available when creating new items or viewing content versions)
Using Visual Editing
Click the button in the preview toolbar to highlight all editable elements. Click any highlighted element to open its editor in a drawer, modal, or popover.
The display options menu provides additional controls:
- Full Width — Expand the preview to full width (you can also drag the divider to 95%+ to trigger this)
- Open in New Window — Pop out the preview to a separate window
- Open in Visual Editor — Jump to the full Visual Editor module (if the module is enabled)
When you save changes, the item refreshes automatically.
Reference Tutorials
Get once-a-month release notes & real‑world code tips...no fluff. 🐰